This tool enables you to export completed grids from a segment document to a Microsoft Excel spreadsheet and then store the output file in either the Campaign Manager Document Store or an FTP site. The export can be performed manually or as part of a scheduled process. You can also add more than one of these tools to the same document so that where required, you can export to multiples files and locations.
Note: If the tool is configured incorrectly on a scheduled document, the export will be skipped.
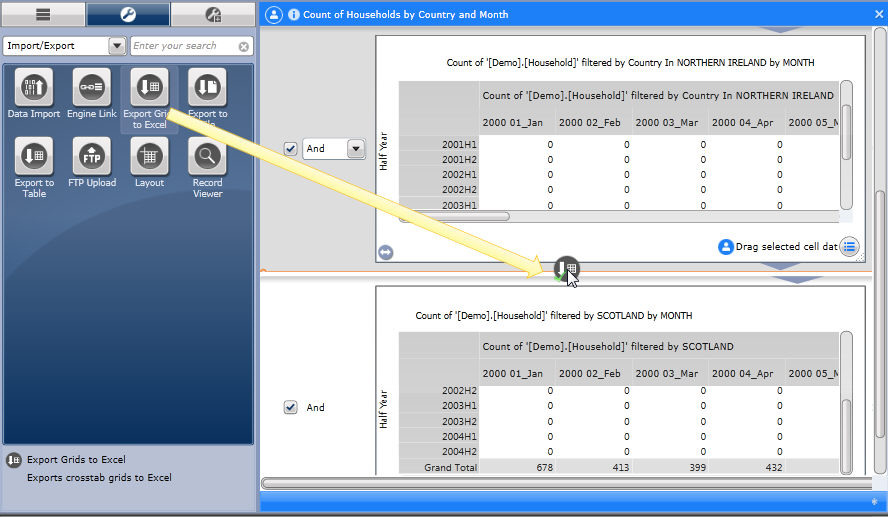
To add a new Export Grids to Excel tool to a segment document, you must drag it from the toolbox to the area below the grid, or a group of grids that you want to export. This displays the tool configuration screen. For example:
All grids above the tool will then be exported in the order in which they are displayed on the screen, provided that they are selected using the check boxes available. When exporting multiple grids which have different templates set in their Excel Configuration settings, only the first template in the group will be applied. However, you can configure each of the grids to use the same template by specifying multiple start points so that the data in each grid is output to a different position or worksheet.
Each Export Grids to Excel tool in a segment document generates a single output file. You can also configure this tool as a standalone document which can then be saved as a template and re-used.
Click here to view an example segment document containing the Export Grid to Excel tool.
Note: To avoid running unnecessary exports, this tool is only processed when you select the Process Export Grids to Excel tools option from the file menu and not when you press the [Process Document] button.
If you only want to export data to a single spreadsheet to be stored on your local machine, refer to the instructions on Export to Excel.
To Export Grids in a Segment Document to Excel:
Drag the Export Grids to Excel tool into the segment document beneath one or more grids that you want to export. For example:
Ensure the checkbox is selected next to each grid that you want to export.
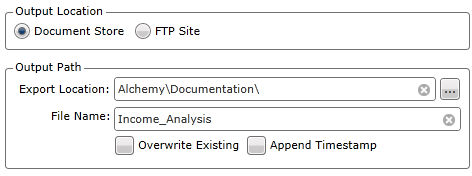
In the Output Location area of the tool, select whether to export the resulting Excel document to the Campaign Manager Document Store or an FTP Site.
The relevant Output Path settings are displayed.
If you selected the Document Store output location, do the following:
Click the [...] button next to the Export Location field to display the Folder Browser. Next, navigate to the folder in which you want to save the output file and then click [OK]. The [New Folder] and [Rename Folder] buttons are also available to select here.
In the File Name field, enter the required name for the output file. For example:
If you selected FTP Site, do the following:
Select the required FTP site from the drop-down of those available.
A list of available folders is loaded into the FTP Folder drop-down.
Select the required folder.
Enter the required output file name. For example:

Check 'Overwrite Existing' if you want the output process to overwrite any existing spreadsheets with this name in the selected output location.
Check 'Append Timestamp' if you want to add a timestamp to the end of your filename, in the 24 hour format HHMMSS. For example, myfile130623.csv.
The timestamp is taken from the IIS/Campaign Manager Application server.
If you want to export additional grids in your segment document to another spreadsheet, drag another Export Grids to Excel tool beneath the grids that you want to export, then configure the tool as described in the above steps. You can create as many output files as required by adding a tool for each file you want to output.
Once you have completed the configuration steps, click Files > Process Export Grids to Excel tools. For example:
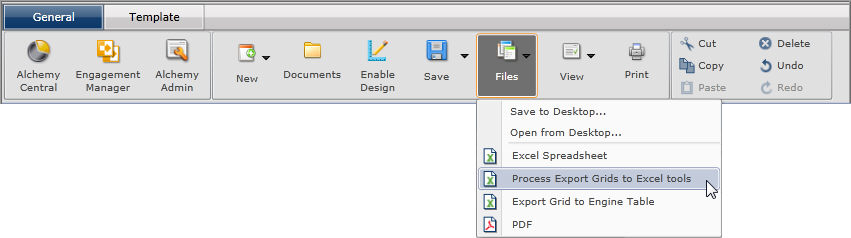
The selected grids are exported and output to the specified Document Repository or FTP Folder.